Backblaze B2 has become a popular cost-effective online storage mechanism, and is typically less expensive than competing services such as Amazon S3.
This wiki describes how to take a large amount of data and back it up to both a local backup, such as an external hard drive or NAS, and a Backblaze B2 account using the CLI on Linux.
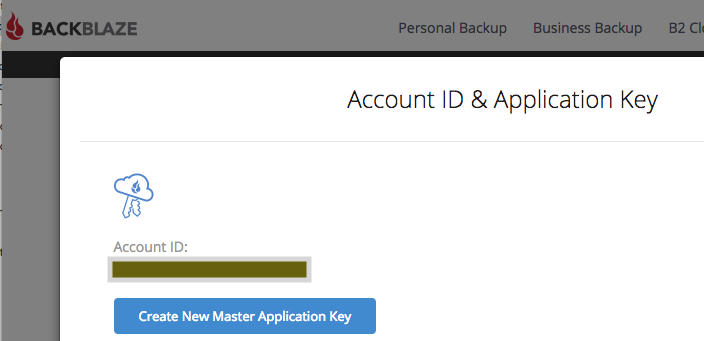
The first step is to create a Backblaze account, and sign up for B2 storage. You will receive a B2 Account ID and a B2 Application Key from Backblaze. Next, from Backblaze’s website, create a B2 bucket. The name for the bucket must be unique across all buckets by all Backblaze B2 users. Substitute this bucket name for the placeholder MY-B2-BUCKET-NAME in this wiki. (Backblaze B2 buckets only allow alphanumeric characters and hyphens.)
And last, if you’re going to be backing up more than the free amount of B2 storage (10 GB as of this writing), then on Backblaze’s website you will need to go to B2 Cloud Storage -> Caps and Alerts, and adjust the maximum daily storage cap. As of this writing (2018-Jun) the pricing for Backblaze B2 storage is $0.005/GB/month. Assuming 30 days/month, this amounts to $0.1667/TB/day, so a cap of $2 per day in storage cost allows for up to 12 TB.
The current download costs are $0.01/GB past 1 GB per day, so the download caps may also need to be adjusted when restoring data, for instance.
Identify the directory to be backed up:
[root@mycomputer ~]# cd /path/to/my/data
[root@mycomputer data]# pwd
/path/to/my/data
Let’s see how much data is to be backed up:
[root@mycomputer data]# du -s -h
3.4T
(Your results will reflect the amount of data contained under your current directory, which is likely to be different than this sample amount.)
Setup local storage and repository
The first step will be to initialize the duplicacy backups at the directory to be backed up (repository in duplicacy terminology).
The “-e” option indicates that this data will be encrypted with a password, so enter (and re-enter to confirm) the desired encryption password when prompted by the duplicacy init command. Assuming a destination for the backed up data is “/path/to/local/backup/destination”, you would issue the following command:
[root@mycomputer data]# duplicacy init -e data_backup /path/to/local/backup/location
Enter storage password for /path/to/local/backup/location /:*********************************
Re-enter storage password:*********************************
/path/to/my/data will be backed up to /path/to/local/backup/location with id data_backup
And the following preferences file will be created
[root@mycomputer data]# cat .duplicacy/preferences

[
    {
        "name": "default",
        "id": "data_backup",
        "storage": "/path/to/local/backup/location/",
        "encrypted": true,
        "no_backup": false,
        "no_restore": false,
        "no_save_password": false
    }
]
Now change the name default to something more descriptive. This will be the locally-connected backup (the external hard drive/NAS), so rename it to describe exactly what this storage is:
[root@mycomputer data]# perl -pi.bak -e 's/default/my_external_hard_drive_backup/' .duplicacy/preferences
The preceding command uses a Perl one-liner to substitute text in-place in a file. The command also creates a backup file, .duplicacy/preferences.bak, that contains the original preferences file (in case something goes wrong here).
Here's the preferences file after the name change
[root@mycomputer data]# cat .duplicacy/preferences

[
    {
        "name": "my_external_hard_drive_backup",
        "id": "data_backup",
        "storage": "/path/to/local/backup/location/",
        "encrypted": true,
        "no_backup": false,
        "no_restore": false,
        "no_save_password": false
    }
]
Setup Backblaze storage and repository
Now add a second storage location for the Backblaze B2 bucket:
[root@mycomputer data]# duplicacy add -e backblaze_b2_data data_backup b2://MY-B2-BUCKET-NAME
(Consider also adding the -copy my_external_hard_drive_backup --bit-identical options to make the B2 and local backups copy-compatible.)
Now enter the B2 account ID, application key, and encryption password when prompted:
Enter Backblaze Account ID:MY_BACKBLAZE_ACCOUNT_ID
Enter Backblaze Application key:MY_BACKBLAZE_APPLICATION_KEY
Enter storage password for b2://MY-B2-BUCKET-NAME:*********************************
Re-enter storage password:*********************************
`/path/to/my/data will be backed up to b2://MY-B2-BUCKET-NAME with id data_backup`
Here's the preferences file after adding backblaze
[root@mycomputer data]# cat .duplicacy/preferences

   [
    {
        "name": "my_external_hard_drive_backup",
        "id": "data_backup",
        "storage": /path/to/local/backup/location/",
        "encrypted": true,
        "no_backup": false,
        "no_restore": false,
        "no_save_password": false
    },
 {
        "name": "backblaze_b2_data",
        "id": "data_backup",
        "storage": "b2://MY-B2-BUCKET-NAME",
        "encrypted": true,
        "no_backup": false,
        "no_restore": false,
        "no_save_password": false
        }
]
Now let’s load the Backblaze account ID, application key, and encryption password for the B2 storage into the preferences file to enable set-and-forget backups:
[root@mycomputer data]# duplicacy set -storage backblaze_b2_data -key b2_id -value MY_BACKBLAZE_ACCOUNT_ID
New options for storage b2://MY-B2-BUCKET-NAME have been saved
[root@mycomputer data]# duplicacy set -storage backblaze_b2_data -key b2_key -value MY_BACKBLAZE_APPLICATION_KEY
New options for storage b2://MY-B2-BUCKET-NAME have been saved
[root@mycomputer data]# duplicacy set -storage backblaze_b2_data -key password -value "MY_ENCRYPTION_PASSWORD"
New options for storage b2://MY-B2-BUCKET-NAME have been saved
Here's the preferences file with all the backblaze config
[root@mycomputer data]# cat .duplicacy/preferences

   [
    {
        "name": "my_external_hard_drive_backup",
        "id": "data_backup",
        "storage": "/path/to/local/backup/location/",
        "encrypted": true,
        "no_backup": false,
        "no_restore": false,
        "no_save_password": false
    },
 {
        "name": "backblaze_b2_data",
        "id": "data_backup",
        "storage": "b2://MY-B2-BUCKET-NAME",
        "encrypted": true,
        "no_backup": false,
        "no_restore": false,
        "no_save_password": false,
        "keys": {
            "b2_id": "MY_BACKBLAZE_ACCOUNT_ID",
            "b2_key": "MY_BACKBLAZE_APPLICATION_KEY",
            "password": "MY_ENCRYPTION_PASSWORD"
        }
        }
]
The preferences file now has enough information stored in it to be able to backup to a B2 account and not require user interaction.
Since the preferences file has passwords, let’s lock down the access to it:
[root@mycomputer data]# chmod -R 600 .duplicacy/
Running the local backup
Now let’s start the local backup first.
Depending on the amount of data to be backed up, the computer’s processing power, and the data connection speed to the external hard drive, it may take some time (possibly on the order of several hours) to complete.
[root@mycomputer data]# duplicacy backup -threads 2 -stats -storage my_external_hard_drive_backup
Enter the encryption password when prompted.
Storage set to /path/to/local/backup/location/
No previous backup found
Indexing /path/to/my/data
 […]
 [lots of “packed” lines…]
 […]
Backup for /path/to/my/data at revision 1 completed
You can experiment with the number of threads used for this task (we assumed 2 here) to minimize the time required for the backup. Be careful that on a HDD many threads will damage your speed instead of increasing it!
Running the backblaze backup
Now that we have a local backup using duplicacy, it’s time to create the online backup to the B2 bucket. Depending on the amount of data being backed up and the upload speed, the duration required for this might be measured in weeks or even months. The following command has been tested using bash and might not apply to all possible shells:
[root@mycomputer data]# nohup duplicacy backup -threads 10 -stats -storage backblaze_b2_data > /path/to/logfile/for/this/backup 2>&1  &
[1] 27719
[root@mycomputer data]#
Let’s dissect this last command:
-
nohup: Continue running this process even after the user logs out, as long as the computer is still running. This is helpful for backing up very large datasets, particularly with slower upload speeds. -
duplicacy backup -threads 10 -stats -storage backblaze_b2_data > /path/to/logfile/for/this/backup: Initiate a backup using 10 threads, show stats at the end, and backup to the B2 bucket that was set up previously.
Send the outputs to the path to the logfile indicated. -
2>&1: Send outputs to stderr to stdout, so anything sent to stderr gets redirected to the logfile as well -
&: Start this as a background process
As mentioned above: you can experiment with the number of threads used for this task (we assumed 10 here) to minimize the time required for the backup. 10 is chosen here (instead of 2) because the slowest part in this backup is the network transfer to Backblaze. This is much much slower than copying to your local HDD.
Monitor backblaze download
You can periodically monitor the backup by looking at the current logfile created:
[root@mycomputer data]# tail /path/to/logfile/for/this/backup
Uploaded chunk 4062 size 14940431, 1.24MB/s 21 days 16:40:28 0.8%
Uploaded chunk 4067 size 2498829, 1.24MB/s 21 days 16:46:32 0.8%
Uploaded chunk 4064 size 3486015, 1.24MB/s 21 days 16:47:06 0.8%
Uploaded chunk 4068 size 2619000, 1.24MB/s 21 days 16:45:05 0.8%
Uploaded chunk 4069 size 3637340, 1.24MB/s 21 days 16:55:20 0.8%
Uploaded chunk 4066 size 12429227, 1.24MB/s 21 days 16:54:05 0.8%
Uploaded chunk 4070 size 9584627, 1.24MB/s 21 days 16:41:25 0.8%
Uploaded chunk 4073 size 2962527, 1.24MB/s 21 days 16:48:43 0.8%
Uploaded chunk 4072 size 5215431, 1.24MB/s 21 days 16:48:39 0.8%
Uploaded chunk 4071 size 6534516, 1.24MB/s 21 days 16:48:33 0.8%
(This is sample data – your log should look similar, but obviously not the same as this.)
Use copy instead of 2 backup commands
This guide teaches you how to setup your backup strategy but has one possible issue: the files between the 2 backups may be modified inbetween the backup runs.
This may be totally fine if you are not concerned about each file beeing exactly the same in both storage. (since we all expect to never need to restore a backup  ).
).
In the case you do need the backups identical, then you will have to adapt the instructions above just a little bit:
- use the
add -copy my_external_hard_drive_backup --bit-identicalcommand - use the
copycommand instead of the second backblazebackup
These 2 steps are better explained in the following #how-to : Back up to multiple storage